Getting Started
This guide will walk you through setting up XUIONE WebPlayer Pro and adding your first IPTV server.
Requirements
Server Requirements
XUIONE WebPlayer Pro requires a Linux server or VPS with the following minimum specifications:
| Resource | Minimum | Recommended |
|---|---|---|
| CPU | 1 vCPU | 2+ vCPU |
| RAM | 1 GB | 2+ GB |
| Disk | 1 GB free | 5+ GB free |
| Network | Public IP or domain | Public IP with domain + SSL |
| Access | Root / sudo | Root / sudo |
Supported Operating Systems
| Distribution | Minimum Version |
|---|---|
| Ubuntu | 22.04+ |
| Debian | 11+ |
| CentOS / RHEL / Rocky / AlmaLinux | 8+ |
| Fedora | 36+ |
| Arch / Manjaro / EndeavourOS | Any (rolling release) |
| openSUSE | 15.4+ |
| Alpine Linux | 3.15+ |
| Linux Mint | 21+ |
| Pop!_OS | 22.04+ |
Software Dependencies
The following packages are required and will be installed automatically by the install script if missing:
| Package | Version | Purpose |
|---|---|---|
| Node.js | 18+ | Application runtime |
| npm | Bundled with Node.js | Package management |
| Nginx | Latest | Reverse proxy / web server |
| ffmpeg / ffprobe | Latest | Media processing |
| curl | Any | HTTP client (for install) |
| git | Any | Version control (for updates) |
Network Requirements
- Port 80 (HTTP) must be available — or choose a custom port during installation
- Outbound internet access for downloading packages and connecting to IPTV servers
- Optional: Port 443 (HTTPS) if using SSL with a domain
Installation
Quick Install (Recommended)
Download and run the installer on your server with your license key:
# Download the installer
curl -Lo install https://xuiwebplayer.com/api/installer/binary?arch=amd64
chmod +x install

# Install with your license key
sudo ./install --license XXXX-XXXX-XXXX-XXXX
The installer will:
- Verify your license key with the license server
- Detect your operating system and version
- Check and install any missing dependencies (Node.js, Nginx, ffmpeg)
- Download the latest release (license-protected)
- Install to
/opt/xuione-webplayer-pro - Auto-configure your license key
- Configure Nginx as a reverse proxy
- Create and start a systemd service
ARM64 Install
For ARM64 servers (Raspberry Pi, AWS Graviton):
# Download ARM64 installer
curl -Lo install https://xuiwebplayer.com/api/installer/binary?arch=arm64
chmod +x install

# Install with your license key
sudo ./install --license XXXX-XXXX-XXXX-XXXX
Docker Install
You can also run XUIONE WebPlayer Pro using Docker:
# Using Docker Compose (recommended)
docker compose up -d

# Or using Docker directly
docker build -t xuione-webplayer-pro .
docker run -d -p 8080:80 --name xuione-webplayer-pro xuione-webplayer-pro
The Docker container exposes port 80 internally, mapped to port 8080 on the host by default.
Managing the Service
After installation, the application runs as a systemd service:
# Check status
sudo systemctl status xuione-webplayer-pro

# Start / Stop / Restart
sudo systemctl start xuione-webplayer-pro
sudo systemctl stop xuione-webplayer-pro
sudo systemctl restart xuione-webplayer-pro

# View logs
sudo journalctl -u xuione-webplayer-pro -f
Uninstall
To completely remove XUIONE WebPlayer Pro:
sudo bash /opt/xuione-webplayer-pro/install.sh -uFirst Login
When you first open XUIONE WebPlayer Pro, you'll see the welcome screen prompting you to add a server.
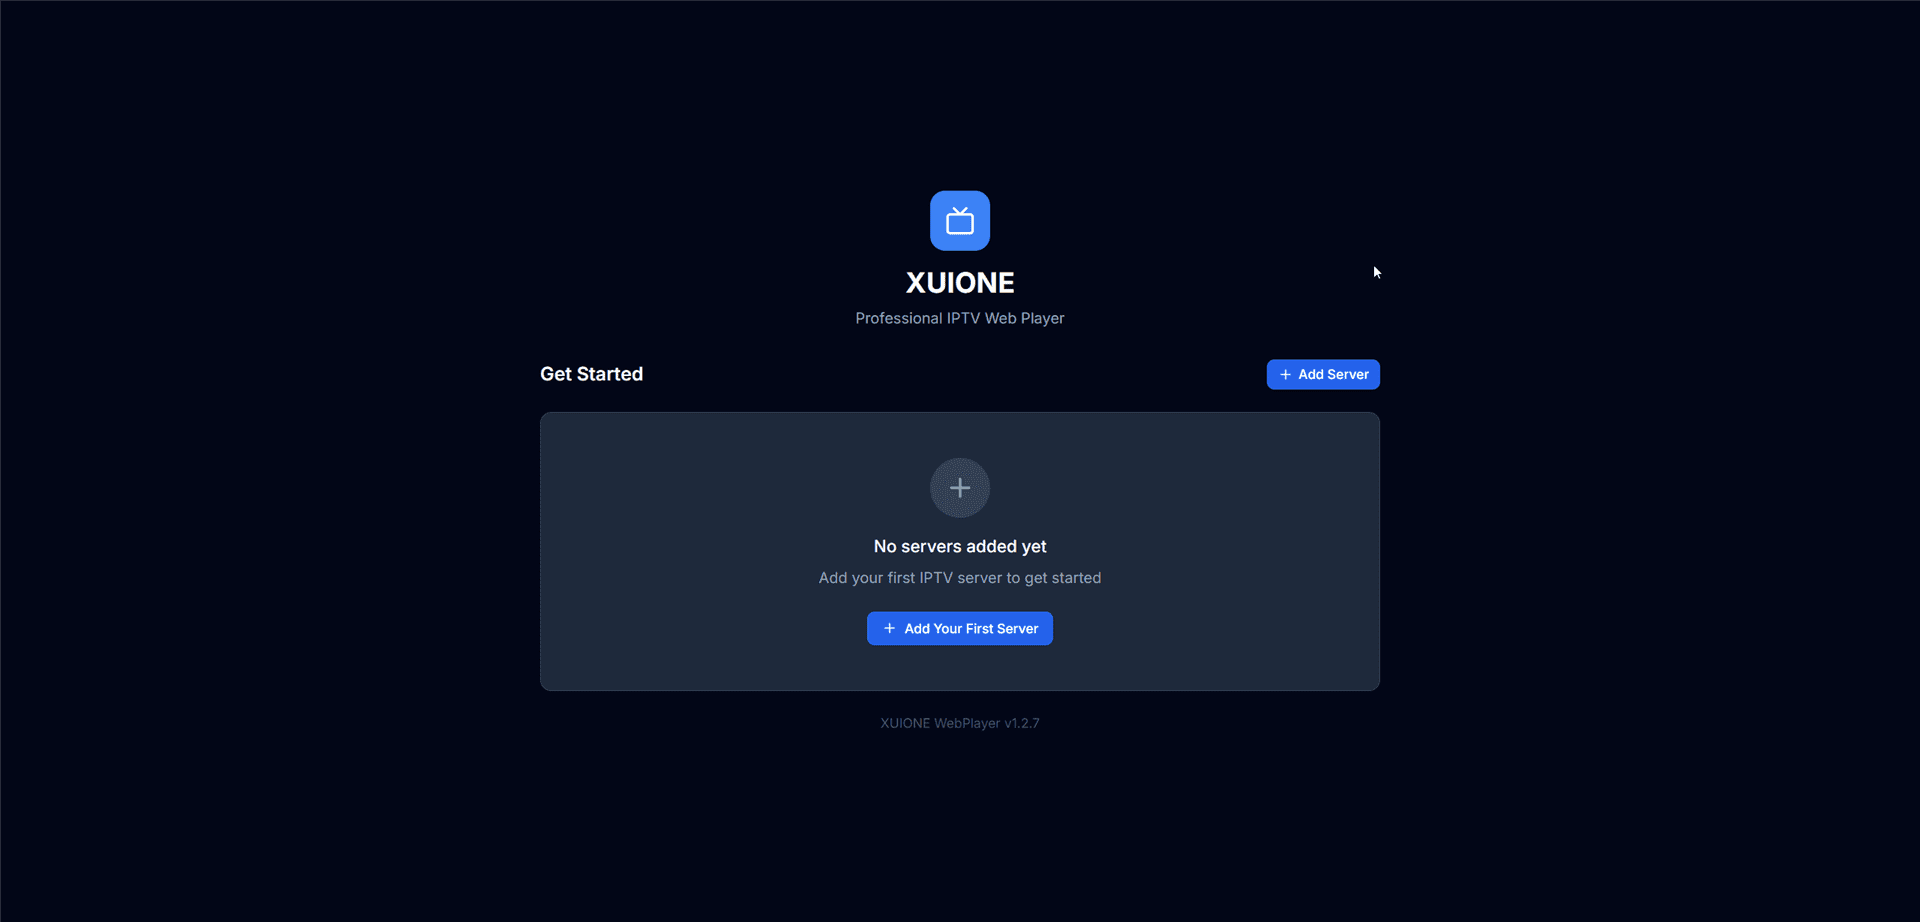
Initial startup screen — No servers added yet
Click "+ Add Your First Server" or the "+ Add Server" button to begin.
Adding a Server
Step 1: Select Provider Type
XUIONE WebPlayer Pro supports two provider types:
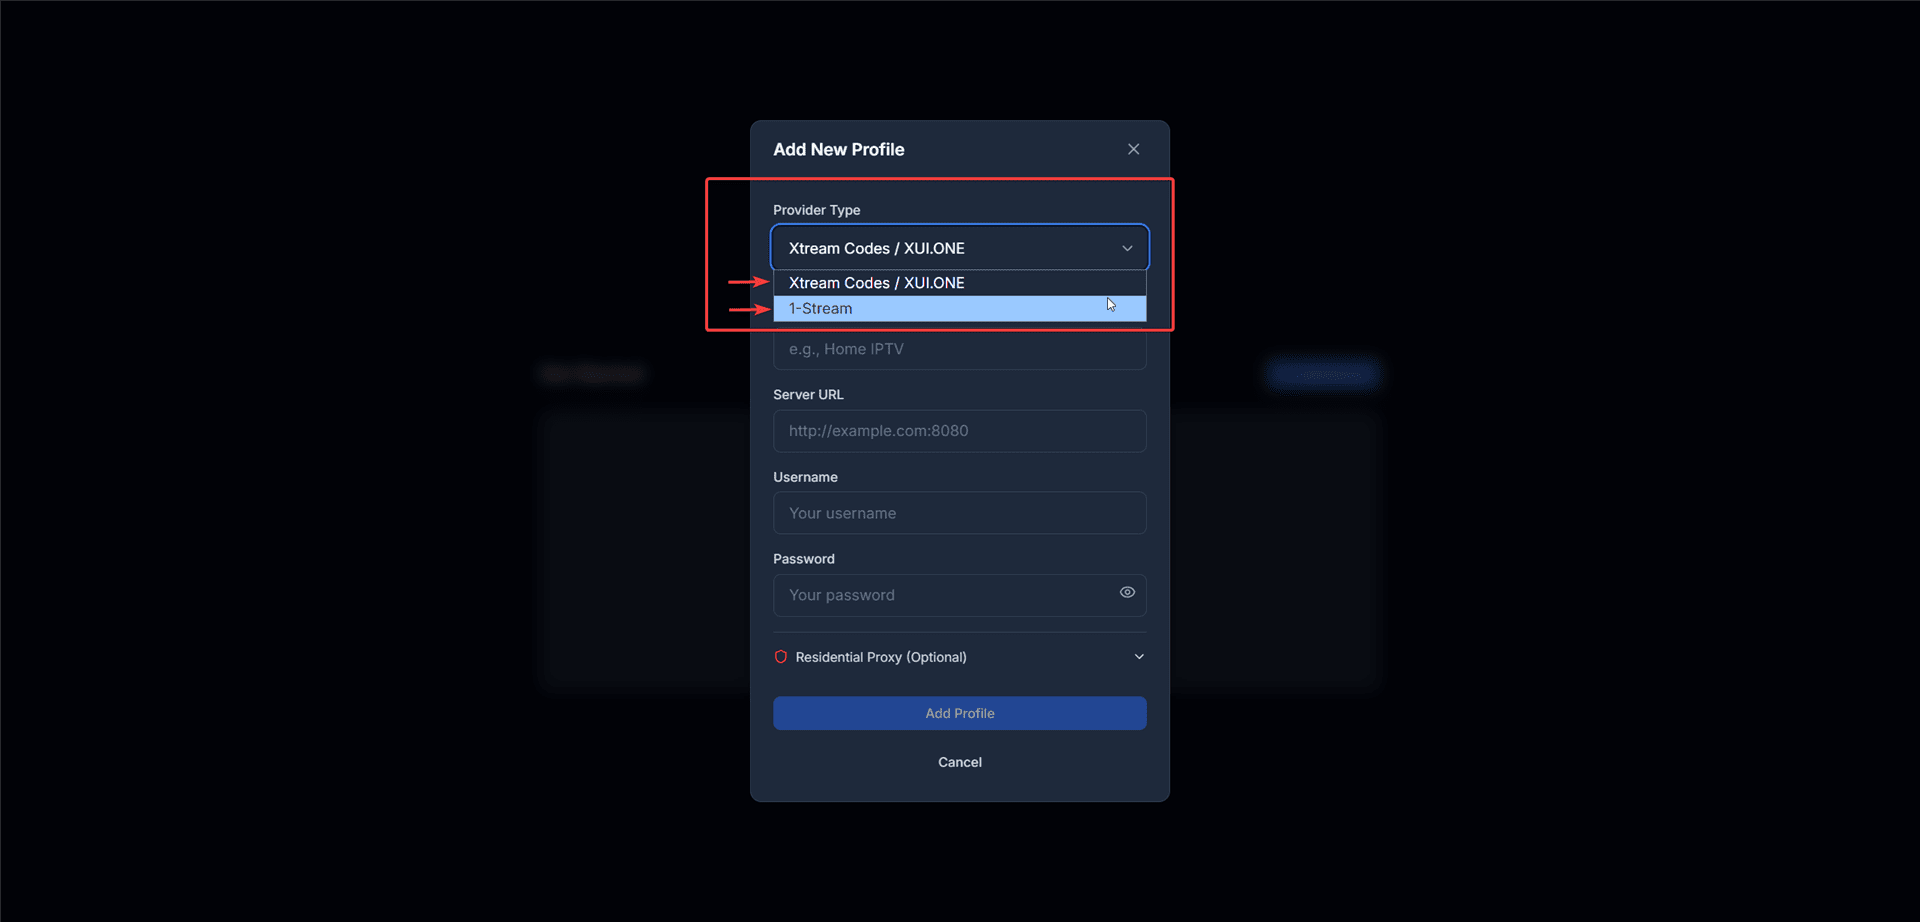
Provider type selection dropdown
| Provider Type | Description |
|---|---|
| Xtream Codes / XUI.ONE | Standard Xtream Codes API — most common format used by IPTV providers |
| 1-Stream | 1-Stream API format with token-based authentication |
Step 2: Enter Server Credentials
Fill in the following information:
| Field | Description | Example |
|---|---|---|
| Profile Name | A friendly name for this server | My IPTV Server |
| Server URL | Your provider's server address | http://example.com:8080 |
| Username | Your account username | user123 |
| Password | Your account password | •••••••• |
Step 3: Residential Proxy (Optional)
If your IPTV provider blocks VPS or datacenter IPs, you can configure a residential proxy.
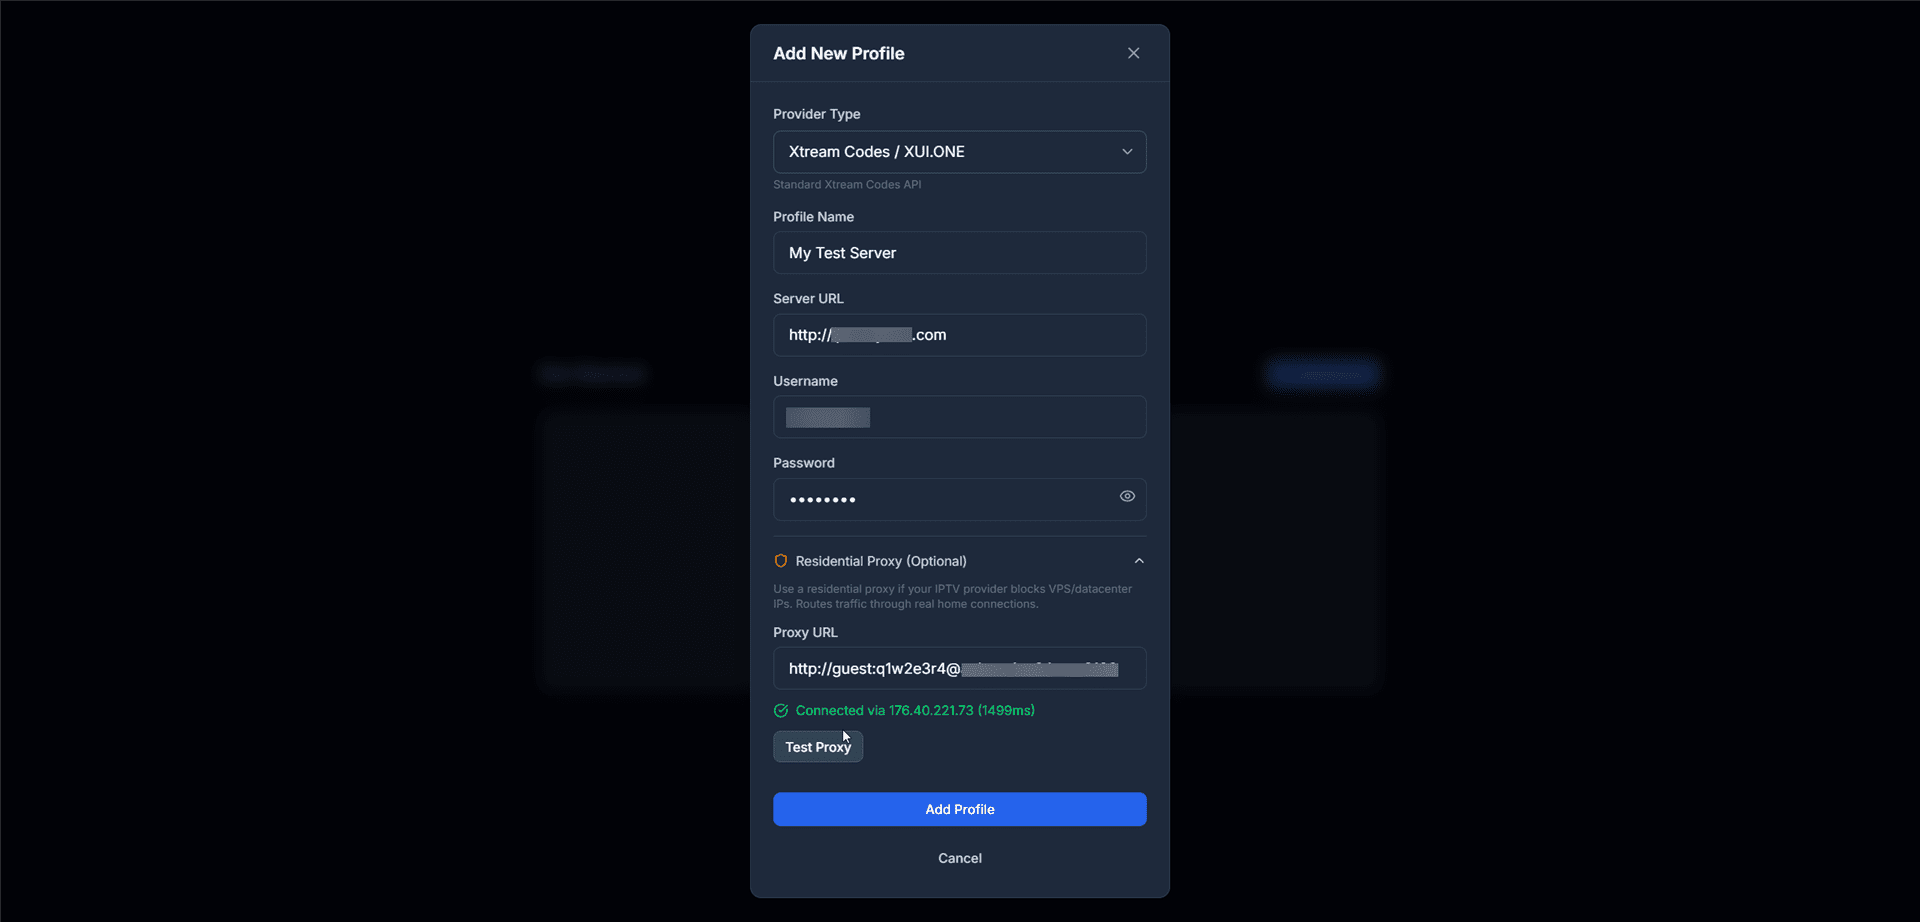
Proxy configuration with successful test
- Your provider blocks non-residential IP addresses
- You're accessing from a cloud server or VPS
- You get "Access Denied" errors from your provider
Supported proxy formats:
http://host:port
http://user:pass@host:port
socks5://user:pass@host:port
Click "Test Proxy" to verify the connection. A successful test shows the exit IP and response time.
Server Compatibility Check
After entering your credentials and clicking "Add Profile", XUIONE performs a comprehensive compatibility check.
Check in Progress
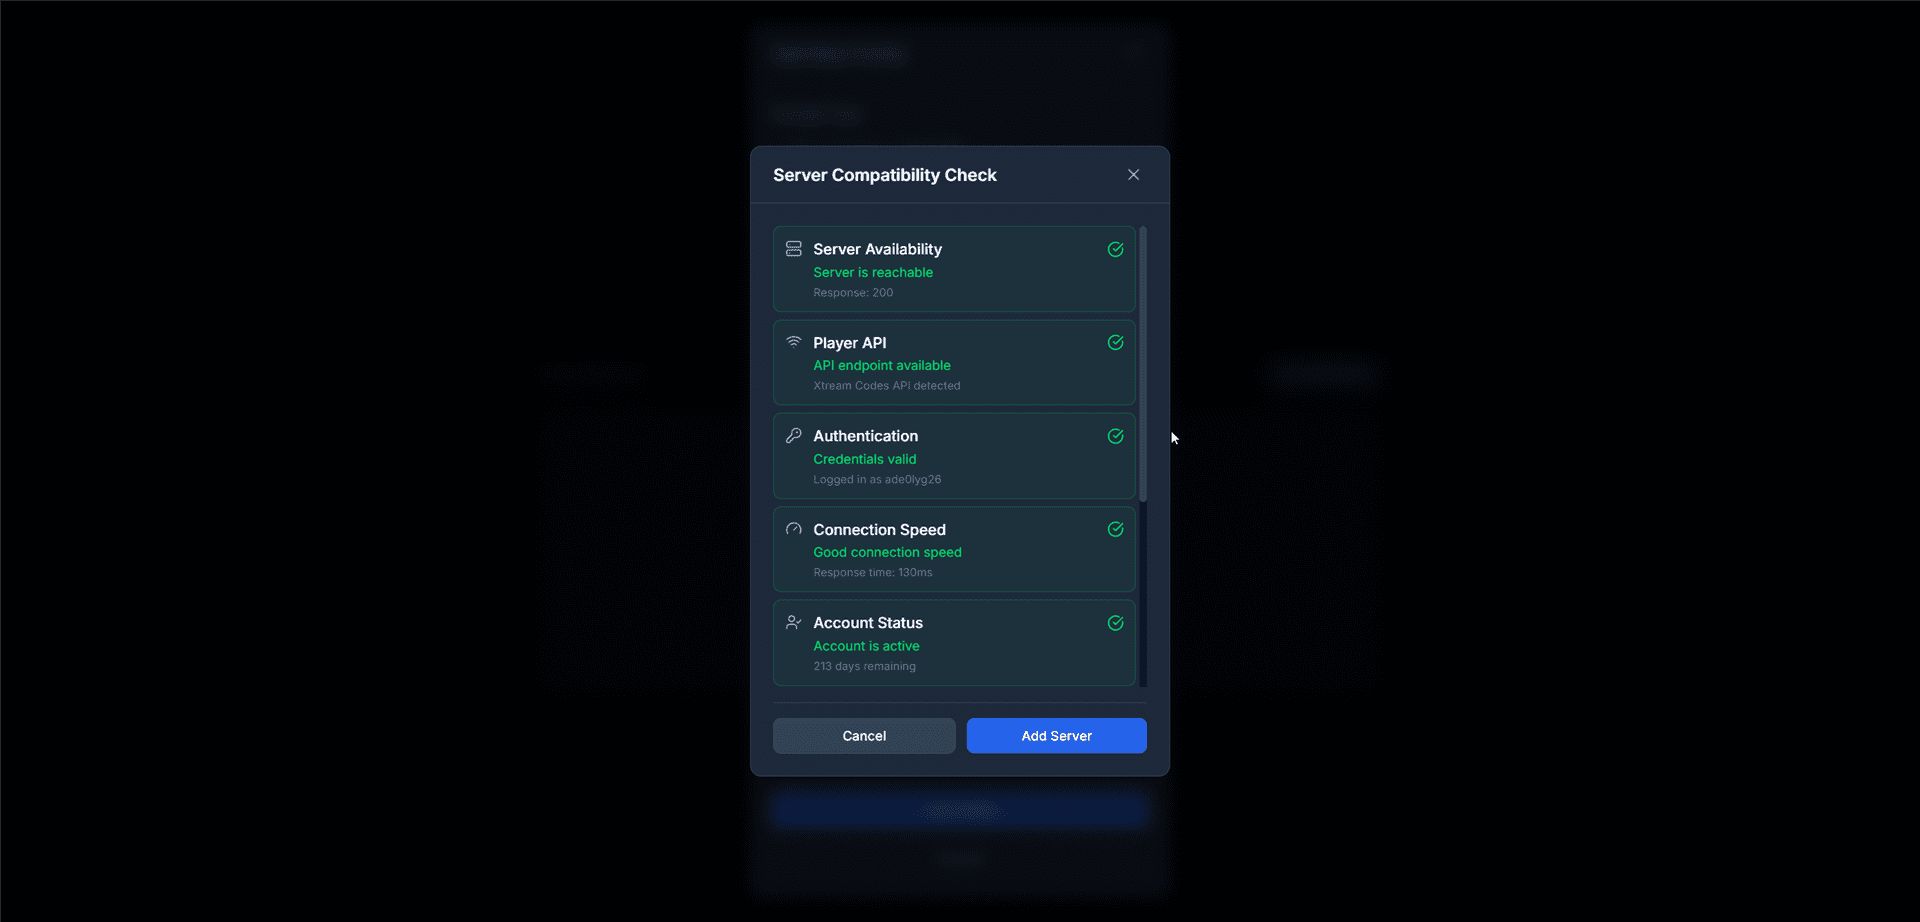
Server compatibility check in progress
The system verifies:
| Check | Description |
|---|---|
| Server Availability | Verifies the server is reachable (HTTP 200 response) |
| Player API | Confirms the API endpoint is available and detects the API type |
| Authentication | Validates your username and password |
| Connection Speed | Measures response time to the server |
| Account Status | Checks if your account is active and days remaining |
Check Complete
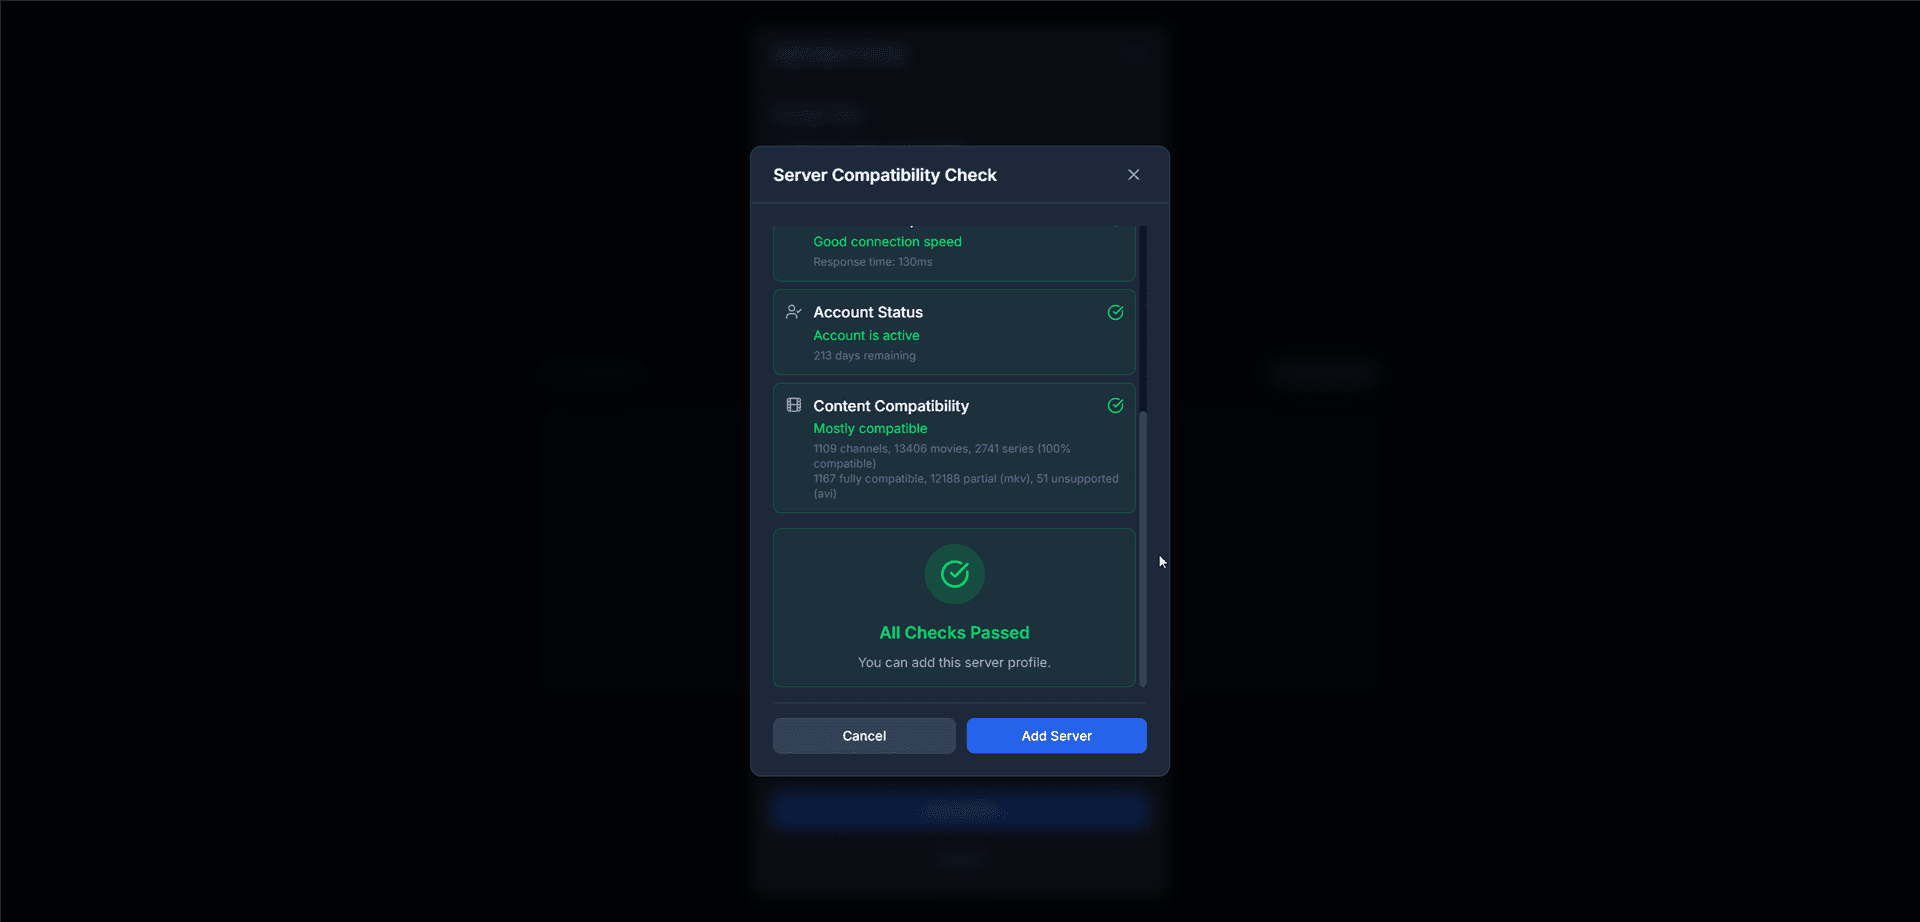
All checks passed — Server is compatible
Once all checks pass, you'll see additional information about content compatibility (channels, movies, series, and format support).
Click "Add Server" to save the profile.
Server Selection
After adding one or more servers, you'll see the server selection screen.
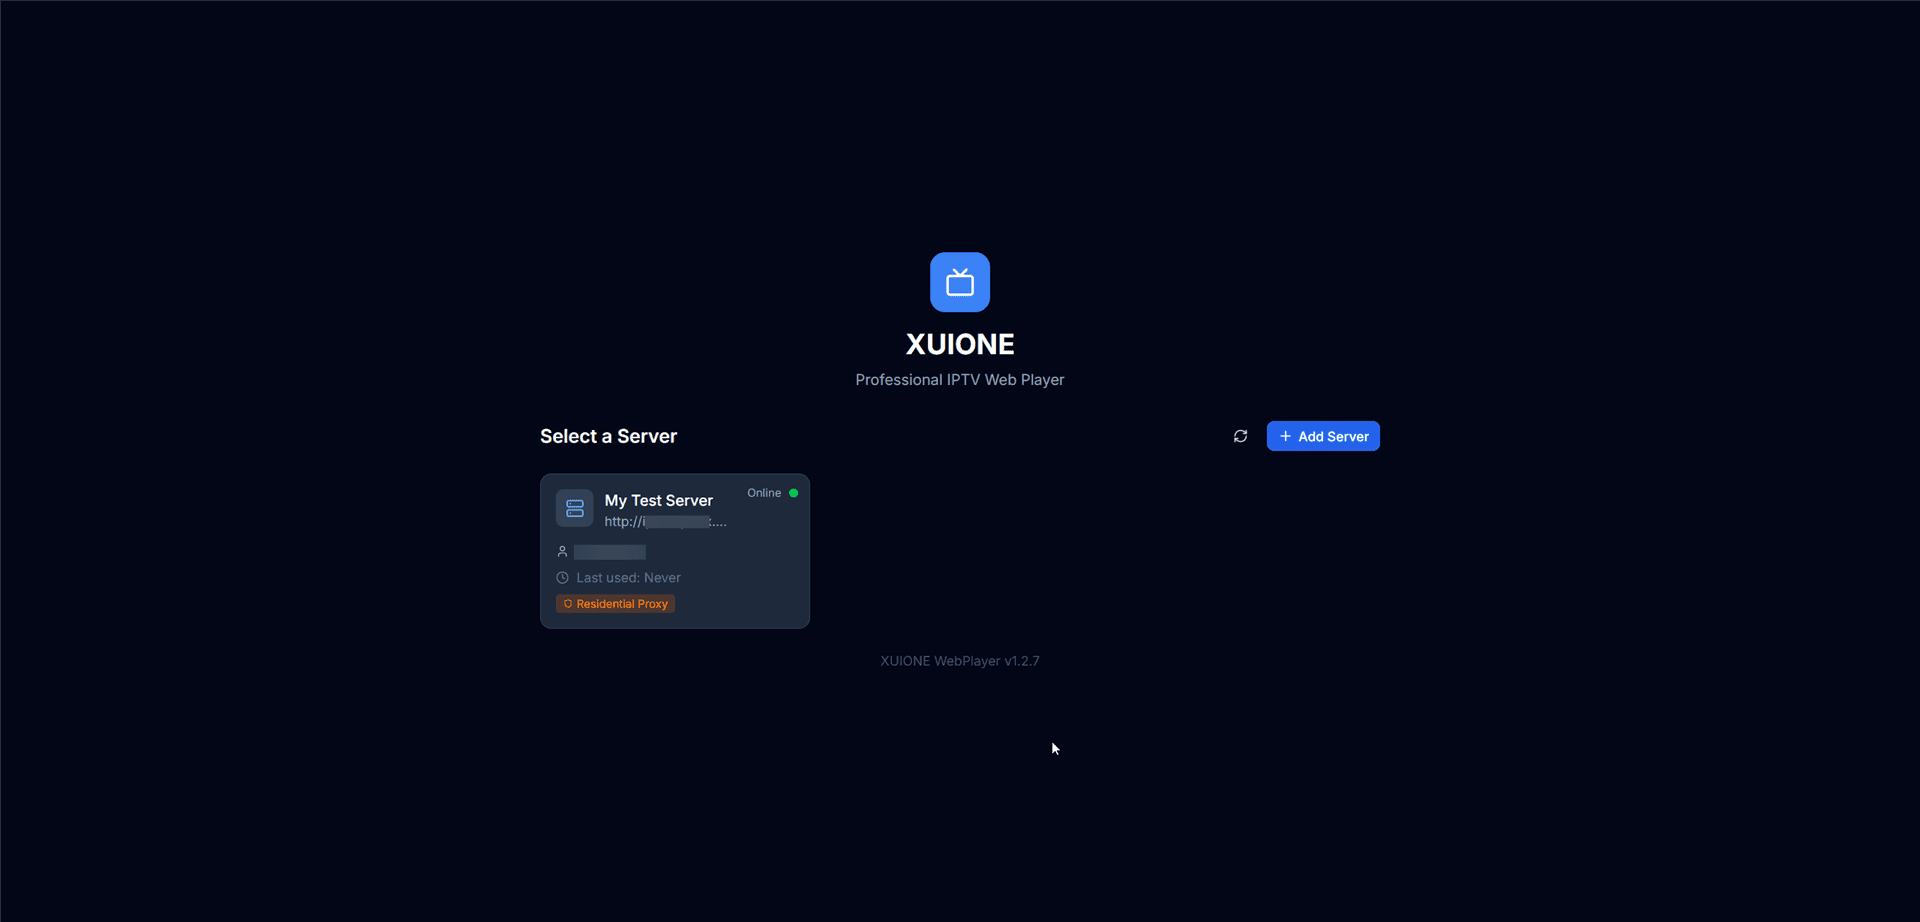
Server selection screen with online status
Server Card Information
| Element | Description |
|---|---|
| Server Name | The profile name you assigned |
| Server URL | The server address |
| Status | Online (green) or Offline (red) indicator |
| Last Used | When you last connected to this server |
| Residential Proxy | Badge shown if proxy is configured |
Click a server card to connect and enter the Dashboard.
What's Next?
After selecting a server, you'll be taken to the Dashboard where you can: